This is an updated version of WTP made in September 2025. The set of available maps has been updated and various things that had rotted over time have been fixed. I first started on WTP in 2008!
For status information and help, see the google group here .
If you see a message about Google Maps failing to load and see map tiles with 'Development' shown on them, then the site is over quota on Google Maps for the day. Please try again in the morning. I do have to pay a bit for the use of Google Maps, and use a daily quota to limit my financial exposure. So if you are inclined, and have benefitted from using the site, do please consider making a donation using the button at the bottom of this page.
Please be aware that Cookies are used to preserve the state of the map display etc between visits. Some special features are used to improve the way the site works on a tablet/phone.
The display of modern Ordnance Survey mapping from OS Data Hub has a monthly limit. So please remember that if you use OS mapping full screen on a big display, you may well cause someone else mapping disappointment later in the month.
Navigate the maps in the normal way with mouse drag and scroll-wheel zoom - or pinch zoom on a tablet. Double click and double tap will do a zoom in. As you move the mouse pointer over one map, or tap a Tablet with your finger, its position is shown on the other - as a blue arrow. If the zoom levels of the two maps are different, the coverage of one map is shown on the other as a blue box.
The controls have been grouped together on Tabs to save space, especially when using a Tablet or Phone.
If an Overlay is selected for either map, re-click the Tab to switch left-right mouse/finger drag, between adjusting the blend of the two map layers and panning of the map.
The following map base layers are available:
The site uses some bespoke, in browser, technology to warp the modern OS mapping to the same projection used by all the other map layers. Only by this means, is it possible to overlay for example Old and Modern OS mapping or OS mapping and Google imagery.
Google Streetview is available on the left or right map by dragging the Google pegman onto the map. A Close button appears on the map tab to exit Streetview mode.
 Placing
Waypoints. Press the button, then click on either map. Click on the Waypoint
marker to give it a name and description (for later export).
Placing
Waypoints. Press the button, then click on either map. Click on the Waypoint
marker to give it a name and description (for later export).  Clearing Waypoints.
 Panning
the maps to the current location provided by your browser.
Panning
the maps to the current location provided by your browser. Use this button, on a local scale left map, to find bus stops.
Thanks go to the folk at bustimes.org for the use of their API.
Click on a bus stop to get a link to services from the stop. Bus stop finding is available for England, Scotland and Wales.
If bus stops have already been loaded, a second press will clear them.
Use this button, on a local scale left map, to find bus stops.
Thanks go to the folk at bustimes.org for the use of their API.
Click on a bus stop to get a link to services from the stop. Bus stop finding is available for England, Scotland and Wales.
If bus stops have already been loaded, a second press will clear them. This is the
'Magic' bit. Press the button to enable or disable 'Magic' path routing. Many local authorities have release
their Public Right Of Way (PROW)
data as 'Open Data'. Barry Cornelius of
rowmaps.com has done a fantastic job of collating these
releases. For WTP, I have processed them so that as you hover over the map, whole path sections are shown and may be added to your route with a single click.
If you start a route with a path, click near the end you want to start at. To
add a path to a route click on it. If your route ended with a clicked path, the
new path will be joined to it as the 'Crow Flies'. If your end of route was not a
path, then a best guess at where you want to join the path and which way you
want to go is made.
This is the
'Magic' bit. Press the button to enable or disable 'Magic' path routing. Many local authorities have release
their Public Right Of Way (PROW)
data as 'Open Data'. Barry Cornelius of
rowmaps.com has done a fantastic job of collating these
releases. For WTP, I have processed them so that as you hover over the map, whole path sections are shown and may be added to your route with a single click.
If you start a route with a path, click near the end you want to start at. To
add a path to a route click on it. If your route ended with a clicked path, the
new path will be joined to it as the 'Crow Flies'. If your end of route was not a
path, then a best guess at where you want to join the path and which way you
want to go is made. Use this button to reverse you route.
 Use this button to cycle through the available colours for drawing you route.
 Use this button to perform a terrain profile lookup of your route. The button
will change to
Use this button to perform a terrain profile lookup of your route. The button
will change to
 ,
the 'Legs' of your route will be coloured according to gradient (red for up,
blue for down) and total ascent, descent and a hiking time estimate will be shown.
To turn the look up off, press the button again
,
the 'Legs' of your route will be coloured according to gradient (red for up,
blue for down) and total ascent, descent and a hiking time estimate will be shown.
To turn the look up off, press the button again
 .
. When terrain data is available for all the Legs of your route, press this button
to show a profile display of you route. Press the button again to hide the
display. You can drag the display to one side, and leave it on whilst you
construct or adjust your route.
When terrain data is available for all the Legs of your route, press this button
to show a profile display of you route. Press the button again to hide the
display. You can drag the display to one side, and leave it on whilst you
construct or adjust your route. Press this button to bring up the Import / Export dialogue. Routes may be
exported as GPX Tracks or GPX Routes to the on screen text area or to a local
file. Waypoints can be included in the export. Import can
be from the text area, from a URL on the text area or from a local file.
WTP will do its best to break up your import into sensible
Legs e.g. by introducing a Leg on a Track or Route near a Waypoint.
Press this button to bring up the Import / Export dialogue. Routes may be
exported as GPX Tracks or GPX Routes to the on screen text area or to a local
file. Waypoints can be included in the export. Import can
be from the text area, from a URL on the text area or from a local file.
WTP will do its best to break up your import into sensible
Legs e.g. by introducing a Leg on a Track or Route near a Waypoint. Once you have a route on screen, press this button to print a Route Card.
The printout will use the same map Base Layer and Zoom as your Left/Top/Only map. The layout is rendered for A4 portrait printing.
Once you have a route on screen, press this button to print a Route Card.
The printout will use the same map Base Layer and Zoom as your Left/Top/Only map. The layout is rendered for A4 portrait printing.That's it. I hope you enjoy it. If you have any questions please ask by email bill.chadwick2@gmail.com or post a message to the google group here where you will also find status news.
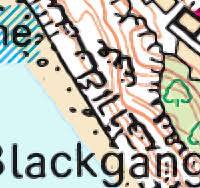 Someone, not me, named Bill in the cliff near Blackgang Chine on the Isle of Wight!
© Bill Chadwick 2025
If you would like to contribute to the continued development and hosting of this site, you may click below to donate via PayPal.